
Part 2 of 3: Transforming Commands into Conversations#
This is the second article in a three-part series exploring the Model Context Protocol (MCP). In Part 1, we built our first MCP server and client with basic tools. Today, we’re taking a giant leap forward: building an AI agent that understands natural language and converts your conversations into precise API calls.
Series Overview:
- Part 1: Building your first MCP server and client with stdio transport
- Part 2 (this article): AI agents, natural language processing, and production patterns
- Part 3: Enterprise deployment, security, and scaling MCP systems
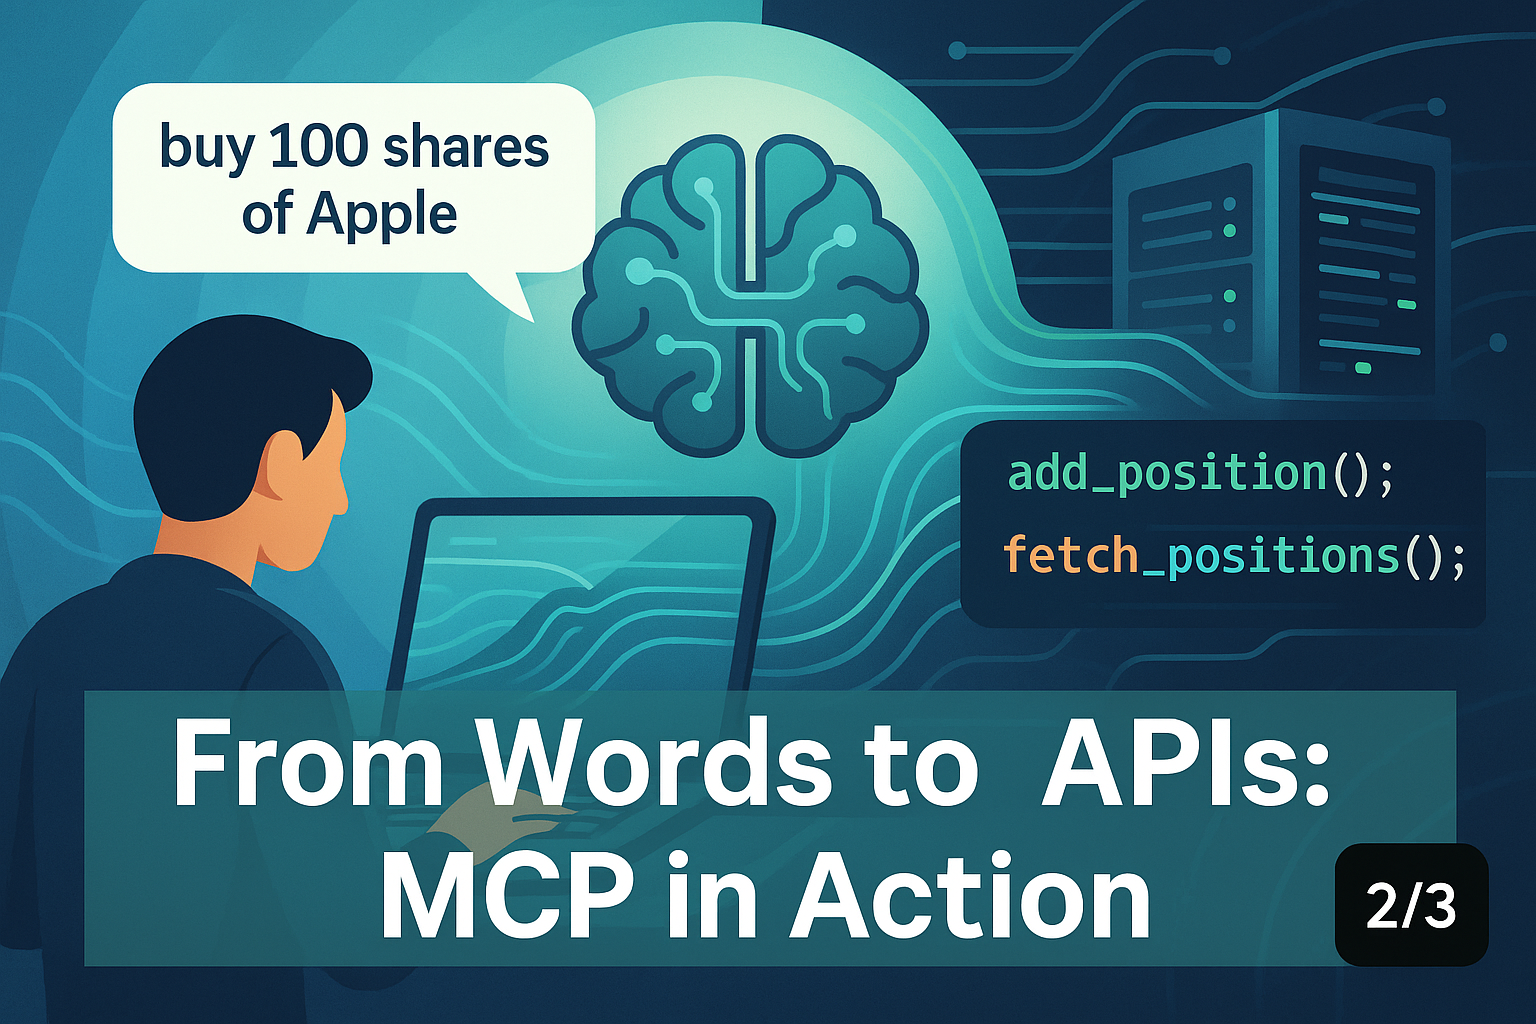
The Magic Moment: When AI Speaks Your Language#
Imagine this conversation with your computer:
You: “Buy 100 shares of Boeing at market price, then show me my portfolio summary.”
AI Agent: “I’ve purchased 100 shares of Boeing (BA) and added them to your portfolio. Here’s your updated summary: You now have 4 active positions across stocks, crypto, and ETFs with a total value of…”
What just happened? Your natural language request was automatically converted into precise API calls: add_position("BA", 100, market_price), followed by fetch_positions() and get_portfolio_summary(). This is the power of combining MCP with modern AI agents.
In Part 1, we manually called MCP tools with explicit parameters. Today, we’re building something far more sophisticated: an AI agent that understands natural language and translates your intentions into the right tool calls automatically.
From Manual Tool Calls to Intelligent Agents#
Let’s first understand what we’re upgrading from and to:
Part 1 Approach: Manual Tool Invocation#
# Old way: Explicit, programmatic tool calls
result = await session.call_tool("add_position", {
    "symbol": "AAPL",
    "quantity": 10,
    "purchase_price": 150.0,
    "asset_type": "stock"
})
Part 2 Approach: Natural Language Agent#
# New way: Natural language that gets converted to tool calls
prompts = [
    "buy 100 stocks at market price for Boeing",
    "show me my portfolio summary"
]
The difference is transformative. Instead of writing code to call specific functions, you describe what you want in plain English, and the AI agent figures out which tools to use and how to call them.
Understanding Transport Mechanisms: stdio vs SSE#
Before diving into our portfolio agent, let’s clarify the two transport mechanisms you’ll encounter in MCP development.
stdio Transport: Development’s Best Friend#
stdio (Standard Input/Output) transport is what we used in Part 1. Here’s how it works:
# stdio transport - runs everything locally
server_params = {
    "command": "python",
    "args": ["portfolio_service_mcp_server.py"]
}

async with MCPServerStdio(params=server_params) as mcp_server:
    # Your client code here
What happens under the hood:
- Your client code starts the MCP server as a subprocess on the same machine
- Communication happens through stdin/stdout pipes
- Both client and server run in the same process space
- Perfect for development, testing, and local applications
Pros:
- Extremely simple setup
- No network configuration required
- Great for learning and prototyping
- Zero latency communication
Cons:
- Limited to single machine
- Can’t scale across networks
- Not suitable for production web apps
- Server dies when client terminates
SSE Transport: Production’s Powerhouse#
SSE (Server-Sent Events) transport enables network communication between distributed clients and servers:
# SSE transport - works across networks
server_params = {"url": "http://localhost:3000/sse"}

async with MCPServerSse(params=server_params) as mcp_server:
    # Your client code here
What happens under the hood:
- MCP server runs independently as a web service
- Communication happens over HTTP using Server-Sent Events
- Client and server can be on different machines, networks, or continents
- Multiple clients can connect to the same server
Pros:
- True distributed architecture
- Scales across networks and cloud environments
- Multiple clients can share one server
- Production-ready with proper deployment
Cons:
- Requires network setup and configuration
- Higher latency than stdio
- More complex error handling
- Security considerations (authentication, SSL, etc.)
When to Use Which Transport#
Use stdio when:
- Learning MCP concepts
- Building desktop applications
- Prototyping new tools
- Running everything on one machine
Use SSE when:
- Building web applications
- Deploying to production
- Scaling across multiple servers
- Supporting multiple concurrent users
For today’s article, we’re using stdio to keep things focused on the AI agent concepts, but I’ll show you exactly how to switch to SSE for production deployment.
Introducing OpenAI Agents: The Natural Language Bridge#
The magic of converting natural language to API calls comes from OpenAI’s new agents library. This isn’t just another SDK—it’s a sophisticated framework that understands how to:
- Parse Intent: Convert “buy 100 shares of Apple” into structured parameters
- Select Tools: Choose the right MCP tool (
add_position) from available options - Execute Actions: Make the actual API calls with proper error handling
- Maintain Context: Remember previous actions within a conversation
Let’s see how this works in practice.
Building the Portfolio Management Agent#
Our portfolio agent will handle complex investment operations through natural language. Here’s the complete implementation:
Step 1: The Data Access Layer (PortfolioService)#
First, let’s understand what PortfolioService represents in our architecture. In traditional distributed systems, this would be your Data Access Object (DAO) layer - the component responsible for interacting with your backend datastore.
Important Note: For this article, PortfolioService uses a simple in-memory list as a stub. In a real production system, this layer would connect to actual databases like PostgreSQL, MongoDB, or even external financial APIs. Think of it as the equivalent of a traditional PortfolioDAO class that would execute SQL queries or call microservices.
# portfolio_service.py - This is essentially your DAO layer
import uuid
from datetime import datetime

class PortfolioService:
    """
    Data Access Layer for portfolio operations.
    In production: would connect to PostgreSQL, MongoDB, or financial APIs
    For demo: uses in-memory list to keep the example focused
    """

    def __init__(self):
        # In production: this would be database connections
        # self.db = Database.connect(connection_string)
        # For demo: simple in-memory storage
        self.positions = [
            {
                "id": str(uuid.uuid4()),
                "symbol": "AAPL",
                "quantity": 10,
                "purchase_price": 150.00,
                "asset_type": "stock",
                "date_added": "2024-01-15",
                "sold": False
            },
            {
                "id": str(uuid.uuid4()),
                "symbol": "BTC",
                "quantity": 0.5,
                "purchase_price": 45000.00,
                "asset_type": "crypto",
                "date_added": "2024-01-20",
                "sold": False
            },
            {
                "id": str(uuid.uuid4()),
                "symbol": "SPY",
                "quantity": 20,
                "purchase_price": 420.00,
                "asset_type": "etf",
                "date_added": "2024-02-28",
                "sold": False
            }
        ]

    def add_position(self, symbol, quantity, purchase_price, asset_type="stock"):
        """
        Add a new position to the portfolio.
        Production version would execute:
        INSERT INTO positions (symbol, quantity, price, type) VALUES (...)
        """
        new_position_id = str(uuid.uuid4())
        new_position = {
            'id': new_position_id,
            'symbol': symbol.upper(),
            'quantity': quantity,
            'purchase_price': purchase_price,
            'asset_type': asset_type.lower(),
            'date_added': datetime.now().strftime("%Y-%m-%d"),
            'sold': False
        }
        # In production: self.db.execute(insert_query, new_position)
        self.positions.append(new_position)
        return new_position_id

    def get_positions(self, asset_type=None, sold=None):
        """
        Retrieve positions with optional filtering.
        Production version would execute:
        SELECT * FROM positions WHERE asset_type = ? AND sold = ?
        """
        filtered_positions = self.positions.copy()

        if asset_type is not None:
            filtered_positions = [pos for pos in filtered_positions
                                if pos['asset_type'] == asset_type]

        if sold is not None:
            filtered_positions = [pos for pos in filtered_positions
                                if pos['sold'] == sold]

        return filtered_positions

    # Additional methods would call database operations in production
Understanding the Architecture Mapping#
Let me clarify how this maps to traditional distributed systems:
Traditional Architecture:        MCP Architecture:
┌─────────────────┐             ┌─────────────────┐
│ REST Client     │             │ MCP Client      │
│ (curl/browser)  │             │ (main.py)       │
└─────────────────┘             └─────────────────┘
         │                               │
         │ HTTP/REST                     │ JSON-RPC 2.0
         ▼                               ▼
┌─────────────────┐             ┌─────────────────┐
│ Web Server      │             │ MCP Server      │
│ (Spring/Gin)    │             │ (MCP decorators)│
└─────────────────┘             └─────────────────┘
         │                               │
         │ Method calls                  │ Direct calls
         ▼                               ▼
┌─────────────────┐             ┌─────────────────┐
│ DAO Layer       │    ===      │ PortfolioService│
│ (Database ops)  │             │ (Our DAO layer) │
└─────────────────┘             └─────────────────┘
         │                               │
         ▼                               ▼
┌─────────────────┐             ┌─────────────────┐
│ Database        │             │ Database        │
│ (PostgreSQL)    │             │ (PostgreSQL)    │
└─────────────────┘             └─────────────────┘
The PortfolioService serves the exact same role as a traditional DAO - it’s just that instead of being called by REST controllers, it’s called by MCP tools.
Step 2: The MCP Server Implementation#
Now we expose these capabilities as MCP tools:
# portfolio_service_mcp_server.py
from mcp.server.fastmcp import FastMCP
from portfolio_service import PortfolioService

# Create the MCP server
mcp = FastMCP(
    name="Portfolio Tracker",
    description="Manages investment portfolio with natural language interface"
)

# Create singleton portfolio service
portfolio = PortfolioService()

@mcp.tool()
def add_position(symbol: str, quantity: float, purchase_price: float, asset_type: str = "stock") -> str:
    """
    Add a new investment position to the portfolio.

    Parameters:
      symbol (str): Ticker symbol (e.g., AAPL, BTC, SPY)
      quantity (float): Number of shares/units
      purchase_price (float): Price per share/unit
      asset_type (str): Type of asset ('stock', 'crypto', 'etf')

    Returns:
      str: Unique ID of the newly added position
    """
    return portfolio.add_position(symbol, quantity, purchase_price, asset_type)

@mcp.tool()
def fetch_positions(asset_type: str = None, sold: bool = None) -> list:
    """
    Retrieve portfolio positions with optional filtering.

    Parameters:
      asset_type (str, optional): Filter by asset type
      sold (bool, optional): Filter by sold status

    Returns:
      list: List of matching investment positions
    """
    return portfolio.get_positions(asset_type, sold)

@mcp.tool()
def get_portfolio_summary() -> dict:
    """
    Get comprehensive portfolio summary with statistics.

    Returns:
      dict: Portfolio summary including totals and breakdowns
    """
    all_positions = portfolio.get_positions()
    active_positions = portfolio.get_positions(sold=False)

    asset_breakdown = {}
    for position in active_positions:
        asset_type = position['asset_type']
        asset_breakdown[asset_type] = asset_breakdown.get(asset_type, 0) + 1

    return {
        "total_positions": len(all_positions),
        "active_positions": len(active_positions),
        "sold_positions": len(all_positions) - len(active_positions),
        "asset_breakdown": asset_breakdown
    }

if __name__ == "__main__":
    mcp.run(transport="stdio")  # Using stdio for development
Step 3: The AI Agent Client with Multi-Turn Conversations#
Here’s where the magic happens. The agent converts natural language into precise tool calls, and demonstrates an important pattern: chaining multi-turn agent conversations.
# main.py
import asyncio
from agents import Agent, Runner
from agents.mcp import MCPServerStdio

async def main():
    # Define how to connect to our MCP server
    server_params = {
        "command": "python",
        "args": ["portfolio_service_mcp_server.py"]
    }

    # Create connection to MCP server
    async with MCPServerStdio(params=server_params) as mcp_server:
        # Create the AI agent with our MCP server
        agent = Agent(
            name="Portfolio Tracker",
            instructions="You are an assistant that uses PortfolioService tools to help manage stock portfolios.",
            model="gpt-4.1",
            mcp_servers=[mcp_server]
        )

        # Demonstration: Multiple connected prompts showing conversation chaining
        prompts = [
            "please provide me with the list of holdings I have",
            "buy 100 stocks at market price for Boeing, followed by list of holdings",
            "buy 200 ETF at market price for VBIL, followed by portfolio summary",
            "sell 100 stocks for Boeing, followed by my updated portfolio"
        ]

        result = None

        for prompt in prompts:
            # Prepare conversation context
            current_input = [{"role": "user", "content": prompt}]

            if result is None:
                # First interaction - no previous context
                conversation = current_input
            else:
                # CRITICAL: Maintain full conversation history
                # result.to_input_list() contains all previous messages + tool calls
                conversation = result.to_input_list() + current_input

            # Run the agent with accumulated conversation context
            result = await Runner.run(
                starting_agent=agent,
                input=conversation
            )

            # Show the result
            print(f"User: {prompt}")
            print(f"Agent: {result.final_output}\n")

if __name__ == "__main__":
    asyncio.run(main())
Understanding Multi-Turn Conversation Chaining#
This example demonstrates a powerful pattern that’s essential for production MCP applications. Instead of running isolated, single-query interactions, we’re chaining multi-turn conversations where each interaction builds on the previous context.
The Magic Line: conversation = result.to_input_list() + current_input
This line does something crucial:
result.to_input_list()returns the entire conversation history including:- Previous user messages
- Agent responses
- All MCP tool calls and their results
- Any errors or intermediate states
+ current_inputadds the new user message to this history
Why This Matters: The agent can now:
- Remember what portfolio positions were just added
- Reference previous transactions in responses
- Maintain context about user preferences
- Provide more intelligent, contextual responses
Production Reality: In a real application, this would be a live conversation between a user and the MCP agent, not a scripted loop. The user would type commands like “buy 100 shares of Apple” and the agent would respond, maintaining full context throughout the conversation session.
How Natural Language Gets Converted to API Calls#
Let’s trace through what happens when you say “buy 100 stocks at market price for Boeing”:
Step 1: Intent Recognition#
The AI agent analyzes your natural language:
- Action: “buy” → maps to
add_positiontool - Quantity: “100” →
quantity=100 - Asset: “Boeing” →
symbol="BA"(the agent knows ticker symbols) - Price: “market price” →
purchase_price=current_market_price - Type: “stocks” →
asset_type="stock"
Step 2: Tool Selection#
The agent examines available MCP tools and selects add_position as the best match for a “buy” operation.
Step 3: Parameter Mapping#
Your natural language gets structured into precise API parameters:
# Natural language: "buy 100 stocks at market price for Boeing"
# Becomes:
add_position(
    symbol="BA",
    quantity=100,
    purchase_price=market_price,  # Agent fetches current price
    asset_type="stock"
)
Step 4: Execution and Response#
The agent calls the MCP tool, processes the response, and provides natural language feedback:
Agent Response: “I’ve successfully purchased 100 shares of Boeing (BA) at the current market price of $180.50 and added them to your portfolio. Your portfolio now contains 4 active positions…”
The Power of Conversation Context#
One of the most impressive features is how the agent maintains conversation context. Notice this sequence:
prompts = [
    "buy 200 ETF at market price for VBIL",           # First command
    "followed by list of holdings of my portfolio",    # Continues context
    "followed by the portfolio summary"                # Builds on previous
]
The agent understands that these are connected requests and executes them in sequence, maintaining context throughout the conversation.
Real Output: Seeing the Agent in Action#
When you run this code, you’ll see something like this:
User: please provide me with the list of holdings I have
Agent: Here are your current portfolio holdings:

1. AAPL (Stock) - 10 shares at $150.00
2. BTC (Crypto) - 0.5 units at $45,000.00
3. SPY (ETF) - 20 shares at $420.00

You have 3 active positions in your portfolio.

User: buy 100 stocks at market price for Boeing, then show my portfolio
Agent: I've purchased 100 shares of Boeing (BA) at $180.50 and added them to your portfolio. Here's your updated portfolio:

1. AAPL (Stock) - 10 shares at $150.00
2. BTC (Crypto) - 0.5 units at $45,000.00
3. SPY (ETF) - 20 shares at $420.00
4. BA (Stock) - 100 shares at $180.50

You now have 4 active positions.
Switching to Production: stdio → SSE#
When you’re ready for production, switching from stdio to SSE transport requires minimal changes:
Current Development Setup (stdio):#
server_params = {
    "command": "python",
    "args": ["portfolio_service_mcp_server.py"]
}

async with MCPServerStdio(params=server_params) as mcp_server:
    # Agent code unchanged
Production Setup (SSE):#
server_params = {"url": "https://your-portfolio-api.com/sse"}

async with MCPServerSse(params=server_params) as mcp_server:
    # Exact same agent code - no changes needed!
The beauty of MCP is that your agent code remains identical. Only the transport configuration changes.
Why This Approach is Revolutionary#
This pattern represents a fundamental shift in how we build software interfaces:
Traditional Approach:#
- Build REST APIs with specific endpoints
- Create frontend forms for each operation
- Users must learn your interface
- Limited to predefined workflows
MCP + AI Agent Approach:#
- Expose capabilities as MCP tools
- AI agent provides natural language interface
- Users describe what they want
- Unlimited workflow combinations
The result? Software that adapts to human communication patterns instead of forcing humans to adapt to software constraints.
Installation and Setup#
To run this example yourself:
# Install required packages
pip install openai-agents mcp[cli]

# Create the three files:
# 1. portfolio_service.py (the core service)
# 2. portfolio_service_mcp_server.py (MCP server wrapper)
# 3. main.py (AI agent client)

# Run the agent
python main.py
What’s Next: Advanced Patterns and Production#
This article demonstrated the core pattern: natural language → AI agent → MCP tools → structured API calls. You now understand how to:
- Build MCP servers that expose business logic as tools
- Create AI agents that understand natural language commands
- Maintain conversation context across multiple interactions
- Switch between development (stdio) and production (SSE) transports
In Part 3 (final article), we’ll explore:
- Enterprise deployment patterns and security
- Error handling and resilience in distributed MCP systems
- Advanced agent patterns and multi-tool workflows
- Monitoring, logging, and debugging production MCP applications
- Best practices for scaling MCP architectures
The future of software interfaces is conversational. With MCP and AI agents, you’re building applications that understand human intentions and translate them into precise actions automatically.
Start experimenting with natural language interfaces today. The gap between human communication and software execution is disappearing, and understanding these patterns will define the next generation of software development.
Found this helpful? Follow me for Part 3, and share your own MCP + AI agent experiments in the comments. What would you build if your software could understand natural language perfectly?